A beautiful and clean feet is highly desirable by every one out there. But only few directs the much-needed time and attention to it. Many of us fear the expenditure at the salon while others are happy with whatever minimal care is taken while showering. Truth is, our feet need as much care we give our face. Undeniably, it’s the part which bears the whole weight of the body and therefore goes through wear and tear due to different types of footwear and socks. This is where we need to put our focus and give it the necessary pampering. A light pedicure session using pedicure tool is now easier than before. Here the steps that you can follow at least ones a week to avoid cracked heels or any other discomfort felt in your feet.
1. Gather the essentials
Before starting on, make sure you have gathered your gear. Here’s what you’ll need for your home pedicure kit:
- Nail polish remover
- Cotton balls
- Nail clipper
- Nail file
- Nail buffer
- Cuticle pusher
- Exfoliating scrub
- Foot file or pumice stone
- Foot lotion
- Base & top coat
- Nail polish
2. Prepare your feet

Dip your feet in a tub of warm water and rest for 10 minutes. Add a capful of distilled white vinegar to cleanse and tone, a few drops of tea tree oil to get rid of germs, or a few tablespoons of sea salt to give the experience a spa-like feel (to help with achy feet). Add a few lemon slices as well, which can soften calluses and cuticles and sanitize your feet.
3. Shape your nails

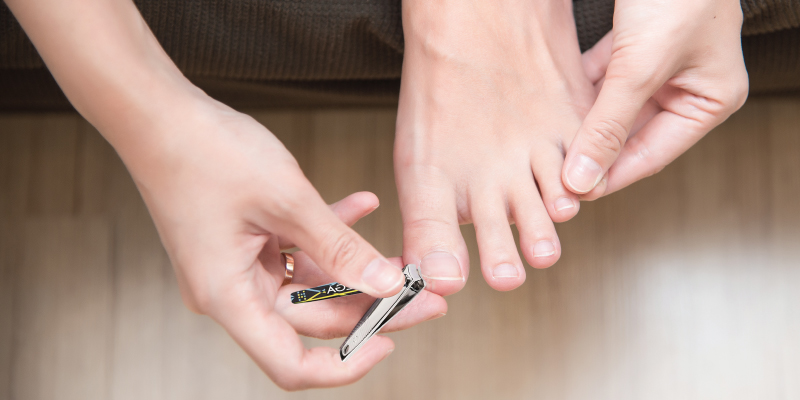
Wait for five minutes after the process for your nails to completely dry and get firm after being soaked in water. Avoid having your nails cut too short. Your fingertips can experience that sharp pain brought on by bare skin if you do this. After using the Vega Small Nail Clipper to trim your nails to the correct length, shape the corners and edges with the file followed by using the Vega cuticle nipper to remove any hangnails. When you're done, carefully buff your nail beds to smooth out any ridges that might make your nail paint application look uneven.
4. Get rid of the dead skin cells
Soak your feet in warm water yet again. To remove all the dead skin and calluses, rub your heels, soles, and sides of your feet back and forth with a Vega foot file or a Vega pumice stone. After that, massage your calves, ankles, and feet with a scrubber. As you finish, rinse with warm water, checking for any leftovers between your cuticles or in between your toes, and then pat dry with a towel. In case you do not want to go for a natural scrubbing process, blend equal amounts sugar and coconut oil to create your own.
5. Moisture
To replace any moisture lost after the scrub, moisturize your feet and calves with lotion or foot cream. In order to simulate the soothing experience of receiving a professional pedicure in a salon, you can give your feet a little massage while this process is going on. Apply lotion between your toes, along the arches and heals of your feet, and support your foot up with a chair or the edge of the tub. Rub away any knots you may feel leftover from your previous workout as you work your way up to your calves.
Now apply a fresh nail color on your beautiful glowing feet. Go for more thin layers that lasts long than fewer thick layers. Make sure to start from the middle of the nails to avoid smudging. If you are not satisfied with the pigmentation of the fist coat then go for a second one. Let the polish to dry for a few minutes before adding a clear top coat to add shine and prevent chipping. Following these simple steps can save you a great deal of money that you think of spending at the salon.


